
If “Google Webmaster Tools” sounds familiar to you, then you might already know what the Google Search Console is.
Since Google Webmaster Tools (GWT) have become a go-to for more people than just webmasters—marketing professionals, SEO experts, designers, and entrepreneurs to name a few—Google decided to change its name in 2015 to better reflect its diverse group of users.
Google Search Console is a free tool that lets you learn a lot about your website and it’s visitors.
This tool helps you analyze how many people visit your site, which keywords they use, which browsers they use, and which pages they find most interesting.
It’ll also let you find and fix website errors, submit a sitemap, and check your robots.txt file.
In short, Google Search Console is a boon for SEO practitioners as well as anybody who’d like to optimize their website for search engines.
Want to know how to take advantage of all that Google Search Console offers? Here’s how.
How to add and verify a Google Search Console site
If you’re new to Google Search Console, you’ll have to verify your site(s) before anything else. When you add a site and verify it in the Search Console, you basically prove to Google that you are the website owner, webmaster, or another authorized user.
First, log in to your Search Console account. Once you’ve logged in, you’ll see a box next to a red button that says “Add Property.”
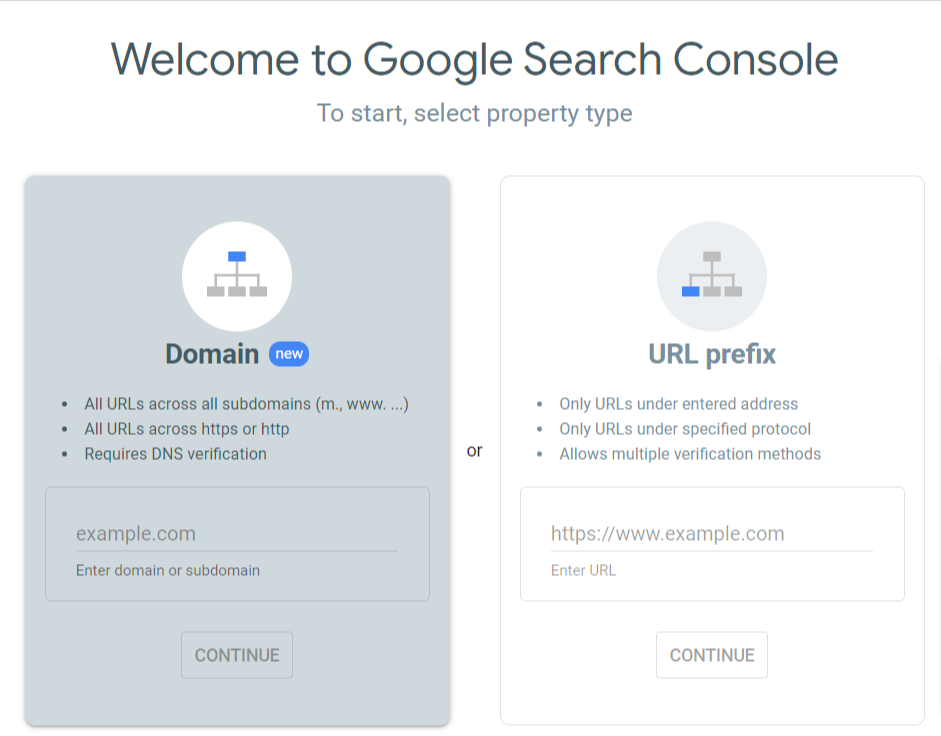
Simply enter the URL of the site you want to verify and click “Add Property.”
Congratulations, your site has now been added to your Google Search Console account!
There are a couple of ways you can verify your website. Determining which method works for you depends on whether you have experience working with HTML, if you have access to upload files to the site, and if you have other Google programs connected to your site.
HTML tag
This verification method is best for users and site owners with experience working with HTML code.
If the “HTML Tag” doesn’t appear under “Recommended method,” click on the “Alternate methods” tab, then select “HTML tag.” This will give you the HTML code you need for verification.

To insert the code into your website’s homepage, copy the code and open it using your HTML editor. Paste the provided HTML code in the <Head> section of your website’s HTML code. If your site does not have a corresponding <Head> section, you may consider creating one for the sake of verification.
Next, save and publish your updated code, then go to your website’s homepage, and check if the source code is there. The verification code should appear in the <Head> section.
Go back to Google Search Console and click “Verify” once the code is added to your site. Google will then check your site’s code for the verification code. If the code is found, you will see a message telling you that the site has been verified. If not, you will receive an error report.
Once your site has been verified by Search Console, do not remove the verification code. Doing so will cause your site to become unverified.
HTML file
To use this method, you must be able to upload files to your site’s root directory.
From the Search Console dashboard, select “Manage site,” then “Verify this site.” If “HTML file upload” is not listed under “Recommended method,” look under the “Alternate method” tab.
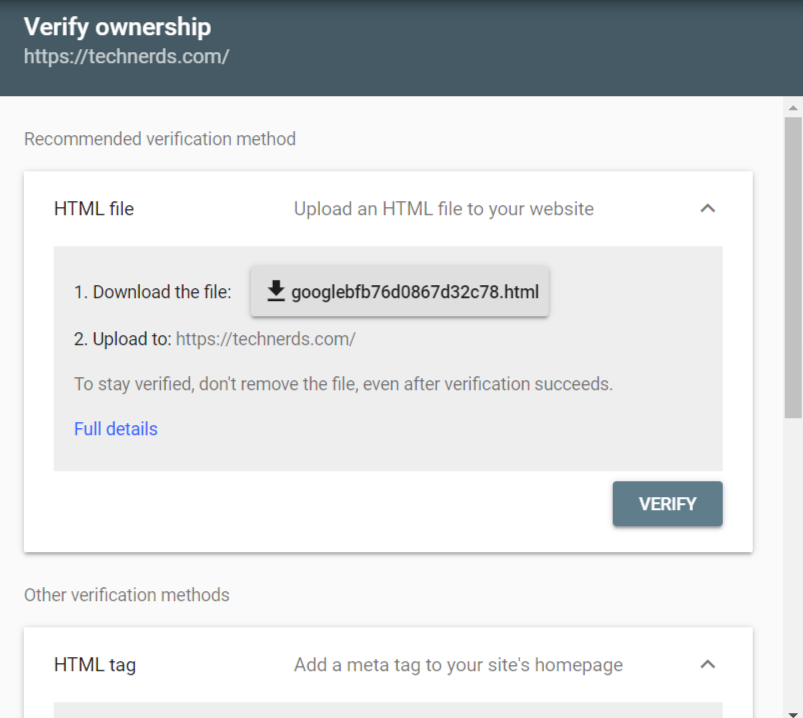
You will be asked to download an HTML file when you select this method. Download the file and upload it to the specified location.
Note that the file must be kept exactly the same; if it is changed, Search Console won’t be able to verify the site.
Go back to the Search Console and click “Verify.” If everything has been uploaded correctly, you will see a message stating that the site has been verified.
Remember not to delete the HTML file from your site after you’ve verified it this way!
Verification via domain name (or domain name server) provider
Domain name providers are companies that you purchase your domain from or hosts your website. Using your domain name provider proves that you are the owner of the main domain, but also of the subdomains and subdirectories associated with it. It’s perfect for sites with a lot of traffic.
If you don’t see the “Domain name provider” option listed under “Recommended method” on the Search Console dashboard, look under the “Alternate method” tab.
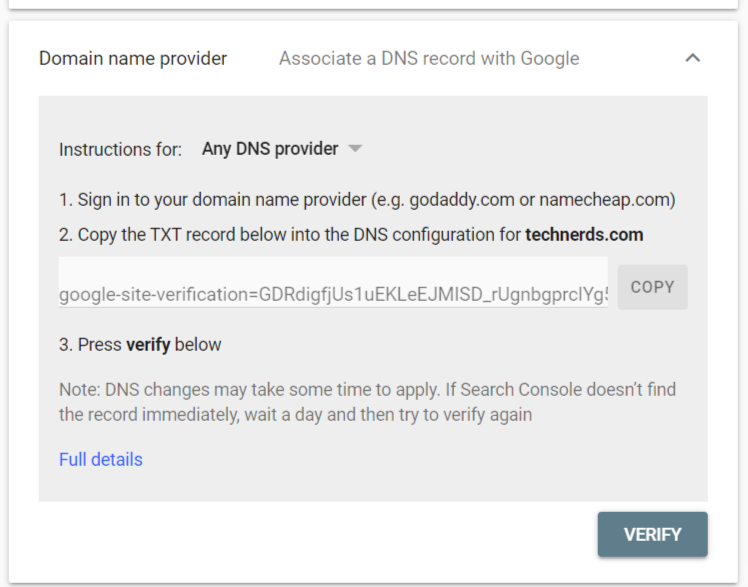
The “Domain name provider” drop-down menu may include a list of commonly used providers, like GoDaddy.com.
To add your own domain name provider, select “Other.” Otherwise, follow the instructions for setting up your DNS TXT records. If a DNS TXT record doesn’t work for your provider, you can create a CNAME record instead.
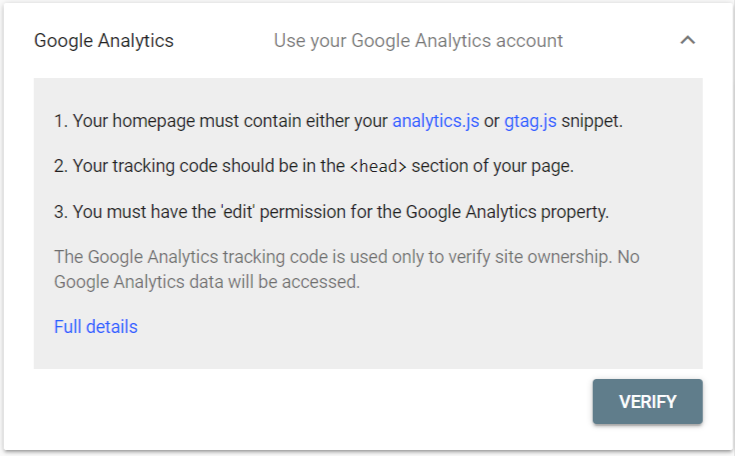
Verification via Google Analytics code
Google Analytics (GA) could be the easiest option for you if you already use it. In order to do this, you must first check that your website’s HTML code already has the GA tracking code in the <head> section of your homepage’s code, not the <body> section.
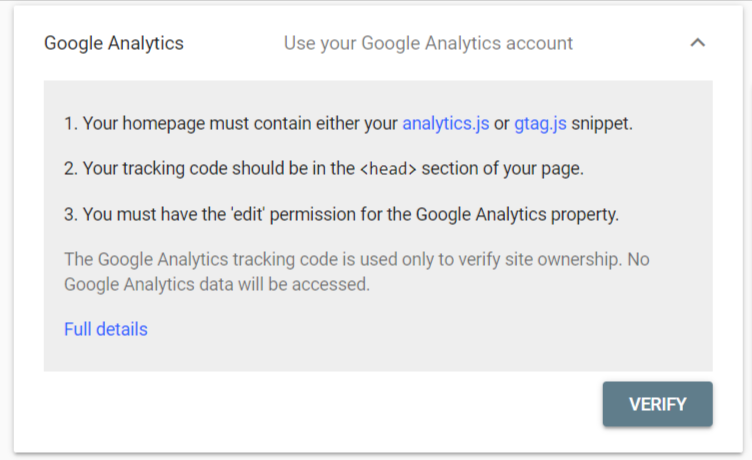
From the Google Search Console dashboard, select “Verify this site” and then “Manage site.” If you do not see the “Google Analytics tracking code” option, you’ll find it under the “Alternate method” tab. Upon selecting it, you’ll be given instructions to follow.
Don’t remove the GA code from your site after it has been verified, or your site will become unverified.
Google Tag Manager
If you already use Google Tag Manager (GTM), this might be the easiest way to verify your site.
To use this method, make sure your GTM account has “View, Edit, and Manage” permissions enabled. You should look at your site’s HTML code to ensure that the GTM code is placed immediately after the <Body> tag.

Choose “Manage site” from the Search Console dashboard, then “Verify this site.”
Select “Google Tag Manager” and click “Verify.” If the Google Tag Manager code is found, you will see a message telling you your site has been verified.
Once your verification is complete, do not remove the GTM code from your site.
Linking Google Analytics with Google Search Console
Although Google Analytics and Google Search Console might seem like they offer similar information, there are some key differences between the two.
GA focuses more on how many people visit your site, how they get to your site, how much time they spend on your site, and where they’re coming from (geographically).
Google Search Console, on the other hand, focuses more on internal data, like who’s linking to you, if there’s malware or other problems on your website, and what keywords your site is ranking for.
Also, Google Analytics and Search Console don’t always treat data the same way, so even if you think you’re looking at the same report, you may not be getting the same information in both places.
It is a good idea to link your GA and Search Console accounts to get the most out of what they provide. By using these two tools, you will be able to combine the data from both sources to generate additional reports.
To do this, first ensure that your site has been verified in the Search Console.
You can connect a site from the Search Console dashboard. Look for the gear icon at the upper right-hand corner of the dashboard. Click on it, then choose “Google Analytics Property.”
Conclusion
Google Search Console lets you monitor, maintain, and troubleshoot the performance of your site in Google’s search results.
Verifying your site means that you will be alerted when Google finds indexing, spam, or other issues with your site. It will also help you monitor backlinks.
It’s a very simple and easy way to keep track of traffic coming to your website. If you are a business owner and don’t have time to do all this, you can consider hiring an SEO Expert with the experience to handle all the backend work for you.
Author Bio

Sajid Hussain is a senior content specialist at TechNerds with proven digital marketing experience under his belt. He harbors a passion for writing on a diverse range of topics related to futuristic technologies, innovation, and digital marketing to educate and inspire his readers.

Hey, that’s really nice article in simple words. It will helpful for beginners to set up Google Search Console.